How to Use Garmin Pay: Your Quick Guide to Wallet-Free Payments
Did you know that 91 Garmin devices now support contactless payments?
That's right - learning how to use Garmin Pay could actually free you from carrying a wallet on your next run or shopping trip. This ingenious system is integrated into most of Garmin's latest watches, making it possible to complete transactions with just a tap of your wrist.
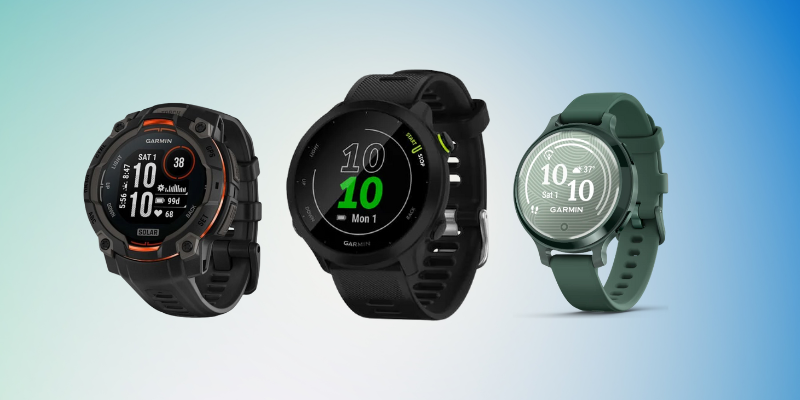
Furthermore, Garmin Pay has been around for years and has become one of the easiest and most secure ways to make payments. Whether you're sporting a Forerunner 165, Fenix 7 Pro, or Garmin Venu 3, setting up your Garmin wallet is surprisingly straightforward.
In this guide, we'll walk you through everything you need to know about how to set up Garmin Pay on your compatible device. We'll specifically cover how to add your cards, make payments, and manage your Garmin wallet - all so you can simply tap your watch against a payment terminal to settle bills. If you're a proud Garmin owners and would like to make sure your smartwatch looks especially nice the next time you're extending your hand out to complete a payment, check out our collection of Garmin straps.
Ready to leave your cash and cards at home? Let's dive in!
What is Garmin Pay and How It Works
Garmin Pay stands as a pioneering contactless payment solution designed primarily for people constantly on the move. This convenient feature allows me to make purchases with just my watch - no wallet or phone needed.
A quick look at contactless payments
Contactless payments represent a modern approach to transactions, enabling me to simply tap my device against a payment terminal to complete a purchase. With Garmin Pay, this technology is integrated directly into compatible Garmin watches, making it perfect for grabbing a coffee after your morning run or getting lunch during a bike ride without carrying extra items.
The system works through Near Field Communication (NFC) technology embedded in Garmin devices. When you hold your watch near a payment terminal, it securely transmits your payment information, completing the transaction in seconds. For security purposes, you must enter a 4-digit passcode that you've previously created, though after the latest update, you only need to enter this code once every 24 hours or when you remove the watch from my wrist.
How Garmin Pay compares to Apple Pay and Google Pay
While Apple Pay, Google Pay and Garmin Pay all enable contactless payments, they differ in several key ways. Importantly, Garmin Pay functions independently of Google and Apple ecosystems, making it a viable alternative for those seeking freedom from big tech platforms.
Unlike Google Pay, which requires Google Play Services and a Google-certified device to function, Garmin Pay works perfectly well even on de-Googled devices. Additionally, once you've set up Garmin Pay through the Garmin Connect app, you can even delete the app afterward and continue using the payment feature on your watch.
In terms of security, all three services employ similar protection measures - using tokenization rather than storing actual card numbers. Garmin Pay protects you by using watch-specific card numbers and unique transaction codes for every purchase.
Where you can use Garmin Pay
You can use Garmin Pay almost anywhere that accepts contactless payments. The service is increasingly available worldwide, though its functionality depends on local bank support and card network compatibility. Some key places where you can consistently use Garmin Pay include:
- Retail stores displaying the contactless payment symbol
- Coffee shops and restaurants
- Public transit systems in many major cities worldwide
- Online payments in the Connect IQ Store for purchasing watch faces and apps
What makes Garmin Pay particularly valuable is that it maintains all the rewards and benefits of your physical cards. It works with numerous major credit and debit cards, including Visa and Mastercard, with more banks being added regularly.
How to Set Up Garmin Pay on Your Watch
Setting up Garmin Pay is a straightforward process that takes just a few minutes to complete. Once configured, you'll be able to make contactless payments directly from your wrist - perfect for those times when you'd prefer to leave your wallet at home.
Download and open the Garmin Connect app
Firstly, ensure you have the latest version of the Garmin Connect app installed on your smartphone. This app serves as the control center for all your Garmin device settings, including Garmin Pay. Open the app and make sure your watch is connected to your phone via Bluetooth.
Create your Garmin Wallet and passcode
Within the Garmin Connect app, tap the "More" option (typically found at the bottom right), then select "Garmin Pay" followed by "Get Started." At this point, you'll be prompted to create a four-digit passcode that you'll need to enter before making payments. This passcode acts as a security measure, ensuring only you can access your payment cards.
Moreover, you'll need to enter this passcode on your watch screen before making a payment, hence keeping your financial information secure.
Add your credit or debit card
Subsequently, you can add up to 10 credit or debit cards to your Garmin Pay wallet. To add a card:
- From the Garmin Connect app, select the menu icon
- Choose "Garmin Pay" then "Add Card"
- Fill in your card details including name, card number, expiration date, and CVV
- Confirm your billing address
Remember: only cards from participating banks will work with Garmin Pay. To check if your bank is supported, visit Garmin's website.
Verify your card with your bank
The final step involves verifying your card with the issuing bank. Your bank might send a verification code via SMS or email. Enter this code when prompted in the app to complete the setup process. If you don't receive a verification code, you can select "Choose another verification method" or contact your bank's mobile payment specialist for assistance.
Once verified, your card will appear in your Garmin wallet and be available for use on your watch - completely independent of your phone.
How to Use Garmin Pay for Payments
Using Garmin Pay simplifies payments and eliminates the need to carry cards or cash during activities. Once set up, making payments is quick and intuitive.
Access the Wallet app on your watch
Initially, you need to open the Garmin Pay wallet on your compatible device. Depending on your watch model, use the appropriate buttons and/or touch screen to navigate to and select the Wallet app. For most Garmin watches, this involves pressing the main button to display the controls menu, followed by selecting the Garmin Wallet option.
Enter your passcode to unlock
Once you've accessed the wallet, you'll need to enter your four-digit passcode to unlock it. Following a recent update, you only need to enter this code once every 24 hours as long as you continue wearing your watch and heart rate monitoring remains enabled. However, if you remove the watch from your wrist, you'll need to re-enter the passcode before making another payment.
Hold your watch near the payment terminal
Upon entering your passcode successfully, your watch will display your card and a colored ring around the screen that counts down. Within this time frame (approximately 60 seconds), position your watch near the contactless payment terminal with the watch face directed towards the reader.
What happens after a successful payment
After completing the transaction, your watch will vibrate or display a checkmark to confirm the payment was processed. Simultaneously, the payment terminal will show that the transaction has been approved. You'll also receive a confirmation via push notification on your phone and potentially an SMS from your bank, depending on your card issuer's policies.
Tips, Devices, and Security Features
Beyond the basics, expanding your Garmin Pay knowledge enhances the overall experience. Let us share some essential tips and insights about this convenient payment system.
List of Garmin Pay compatible devices
Garmin Pay works with an impressive range of devices. The compatibility list includes the Fenix series (5 Plus through 8), Forerunner models (255, 265, 645, 745, 945, 955, 965), Venu series, Vivoactive 3-6, Instinct series, MARQ collections, and Approach watches. Essentially, most Garmin watches released in recent years support this payment feature.
Additionally, we have a large collection of accessories for all models mentioned above, as well as every other Garmin watch. You can for instance take a look at our Garmin Fenix straps, or our selection of straps for Garmin Forerunner.
Set a shortcut for faster access
Accessing Garmin Pay quickly is possible by setting up a dedicated shortcut. On most devices, press the main button, select settings, and choose the button combination you prefer. Alternatively, for touchscreen models like Venu, swipe right from the watch face, select "Setup" if it's your first shortcut, or hold and select "Shortcut Settings" if reconfiguring.
How secure is Garmin Pay?
Garmin Pay offers robust security through several measures. Consequently, your card number is never stored on your device, Garmin's servers, or passed to merchants. Instead, it uses watch-specific card numbers and unique transaction codes for every purchase. Furthermore, the daily passcode requirement adds an extra layer of protection.
Managing or removing cards from Garmin Wallet
To manage cards, open the Garmin Connect app, select the menu, tap "Garmin Pay", and choose your card. From there, you can temporarily suspend a card or delete it completely. Unless you want to cancel your physical card too, removing it from Garmin Pay only affects the digital version.
Conclusion
Garmin Pay is more than just a convenient feature - it's a lifestyle upgrade for anyone who values mobility, security, and simplicity. Whether you're running errands, hitting the gym, or going for a long-distance ride, this contactless payment system ensures you never have to fumble for your wallet again. With broad device compatibility, robust security measures, and support for major card networks, Garmin Pay transforms your watch into a powerful payment tool. Now that you know how to set it up and use it, you’re ready to leave your cards behind and embrace the freedom of wrist-based payments.


